Showing posts with label radish. Show all posts

Tuesday, July 2, 2013

First recipe of the 2013 summer season!

It is time for some yummy tummy goodness! I have cooked a variety of meals using veggies from the garden this season. My favorite dish is my tofu, green pepper, and summer squash curry. Here is my recipe:

Ingredients:
1 block of extra firm tofu
three small or two medium sized summer squash
two large bell peppers
extra virgin coconut oil
Jar of your favorite curry sauce

stir fry tofu and veggies in coconut oil on medium heat
once tofu and veggies are seared, add in a jar of your favorite curry
simmer for 10 minutes on low heat, remove, serve with rice
I have also been busy harvesting veggies three to four times a week. The weather has warmed up and the veggies are popping out faster than I can eat them.

basket full of green beans
My mother blanched, packed, and froze 4 quart Ziploc bags of beans.  These beans are going to taste good in green bean casserole, soups, and as a side dish... nom nom!


The plums are starting to ripen and fall from the tree. In order to keep our backyard mess-free, I picked as many ripe plums as I could. There are still lots to be picked.


The summer squash is growing rapidly while the green bell peppers are growing into yummy crisp veggies. I have harvested over a dozen green bell peppers, three dozen cucumbers, and handfuls of radishes.

radish, cucumbers, okra

Sunday, June 23, 2013

Green beans are here!

green beans
The green beans have arrived. I picked the first batch of beans on June 21st and have picked a few handfuls each day since. These long slender crunchy beans will continue to grow throughout the summer. Green bean casseroles here we come, YUM!

cucumbers are bursting from the vines
The corn stalks have reached for the skies and beyond. The tassels are swaying in the wind and will soon float down to the silk to make sweet corn kernels.

Silk has emerged!
The MVG harvests are full of variety and growing in size. I am still picking zucchini, squash, and cucumbers on a regular basis. However, the radish have matured and are bringing red orbs of color to our salads and soups.

June 21, 2013 MVG harvest

Wednesday, June 12, 2013

MVG's First Okra

Every day I walk out to the MVG and pick zucchini, squash, radish, strawberries, and cucumbers. I can now add okra to my list. Our first okra measures in at 5 1/2 inches. I cannot wait to fill up a whole basket.

June 12th harvest

Wednesday, May 29, 2013

We see veggies!


Morrison Victory Garden - May 29th
There has been lots of growth in the MVG over the past few weeks. I have seen many flowers bloom and push out small yummy vegetables.

radish are peaking out
The first plant to push out veggies is our zucchini plant. The first zucchini of the season is currently three inches long and growing rapidly.

zucchini
The summer squash is showing flowers and fruit. The squash is small but you can see the yellow color peaking out from behind the green leaves.

summer squash
The cucumbers are peaking out from behind small yellow blossoms too. I can see over a dozen small cucumbers growing and many more will soon fill the 20 cucumbers plants in the MVG.

cucumbers
All of the sweet pepper plants have flowers and the cherry stuffers have small green orbs dangling from the branches.

cherry stuffer peppers
tomato blossoms
The okra, tomatoes, hot peppers, and eggplants are showcasing a variety of flowers but have not produced fruit yet.

a little lavender for luck
The weather has cooled down and we are hoping for higher temperatures in the upcoming weeks. Hotter weather will bring more flowers and fruit to the MVG so keep your roots crossed. We want a big harvest this year.

Thursday, May 31, 2012

Radish, growing faster than a speeding bullet


sparkler radish picked May 6, 2012
Remember my blog about radish as space savers or garden art?  Well, here they are.  The radish are plumping up nicely.  They will be great in salads or as a crunchy side dish. I have include a visual account of how fast these little orbs of goodness mature.

radish sprouts May 6, 2012
radish May 12, 2012
radish May 26, 2012
radish picked May 27, 2012
more radish May 30, 2012


Saturday, May 26, 2012

Colorful flowers turn into baby beans

I might not be Cole Sear, from the film Sixth Sense, because I cannot say "I see dead people." But I know what I can see... I SEE BABY BEANS!

scarlet emperor baby beans
I was pleasantly surprised to see beans pushing out on the Burgundy, Blue Lake, and Scarlet Emperor plants. The spring weather has been cold, which has slowed down the growth of the eggplants and peppers.  But I am hoping the summer heat will help the victory garden produce a wealth of veggies.  So far the beans seem to like the cool wind and warm sun.

blue lake baby beans

burgundy baby beans

The sugar snaps are thriving and producing sweet crunchy pods.  Mmmm... I cannot help popping one into my mouth while picking them. They are so good.

sugar snaps picked May 25, 2012
I have planted more sugar snaps, blue lake and burgundy beans.  I like to stagger my planting of beans to help maintain a steady harvest all season. Nom nom!

Tuesday, May 1, 2012

Radish, space saver or garden art

The radish are here!  These fast growing Sparkler radish are the first vegetable to be harvest from the garden beds.  The are big, round, and red! The leaves are tender and can be used in soup too.

Sparkler radish
I like to plant radish seeds in between larger plants.  This is very helpful when your transplants are small.  I have recently transplanted tomatoes, eggplant, and bell peppers into the victory garden.  I give the transplants a few days to settle into the garden beds. I plant radish seeds in between the rows of plants.  This not only saves space but also give the garden beds a bit of visual aesthetics. You can call it garden art or space saving.  Either way, it works for me.

beet seedlings
You may use beets, carrots, lettuce, and pak choi, among others types of quick or slow growing veggies to decorate your garden and feed your tummy.  I personally love the rich bloody color of beets.  Even the stems and leafs are unique in color and texture.

volunteer beet from 2011 season
Beets are not a favorite in my house so I have turned to radish as my paint brush for the victory garden.  I chose to plant more varieties of radish this season because my family eats, pickles, and cans radish.

2011 season Minowase radish
Plus, I am the type of farmer who loves to find, pick and plant crops.  Most items in the garden take a few months to grow.  But radish have a fast life cycle.  You can grow a radish from seed in a month.  I decided to buy a variety of radish seeds to help plant color into the victory garden.  To make things interesting, I placed all of the seeds into a bowl and mixed them up.  When planting rows of radish, I just pull from the bowl of mixed seeds.  This will give me a variety of radishes while allowing for a mix of color to shine when the radish tops peak out of the soil.


Radish mix: Cherry belle, Sparkler, and Champion
Radish planted for pickling: Icicle (short top) and Minowase

Tuesday, March 27, 2012

Vertical gardening - the basics

I received a book from my father titled, Vertical Gardening: Grow Up, Not Out, For More Vegetables and Flowers In Much Less Space by Derek Fell. My father had given me the book in the middle of a college semester.  This meant, the book would sit on my bookshelf for a few months while I read and grade student papers.  Once I had a break, I found time to read the book.  I found the book easy to read.  The entire book is organized for a beginner, like myself, who wants to jump from topic to topic while absorbing the information again and again.  I have read the book over 3 times cover to cover and spent a few hours perusing particular chapters and pages.

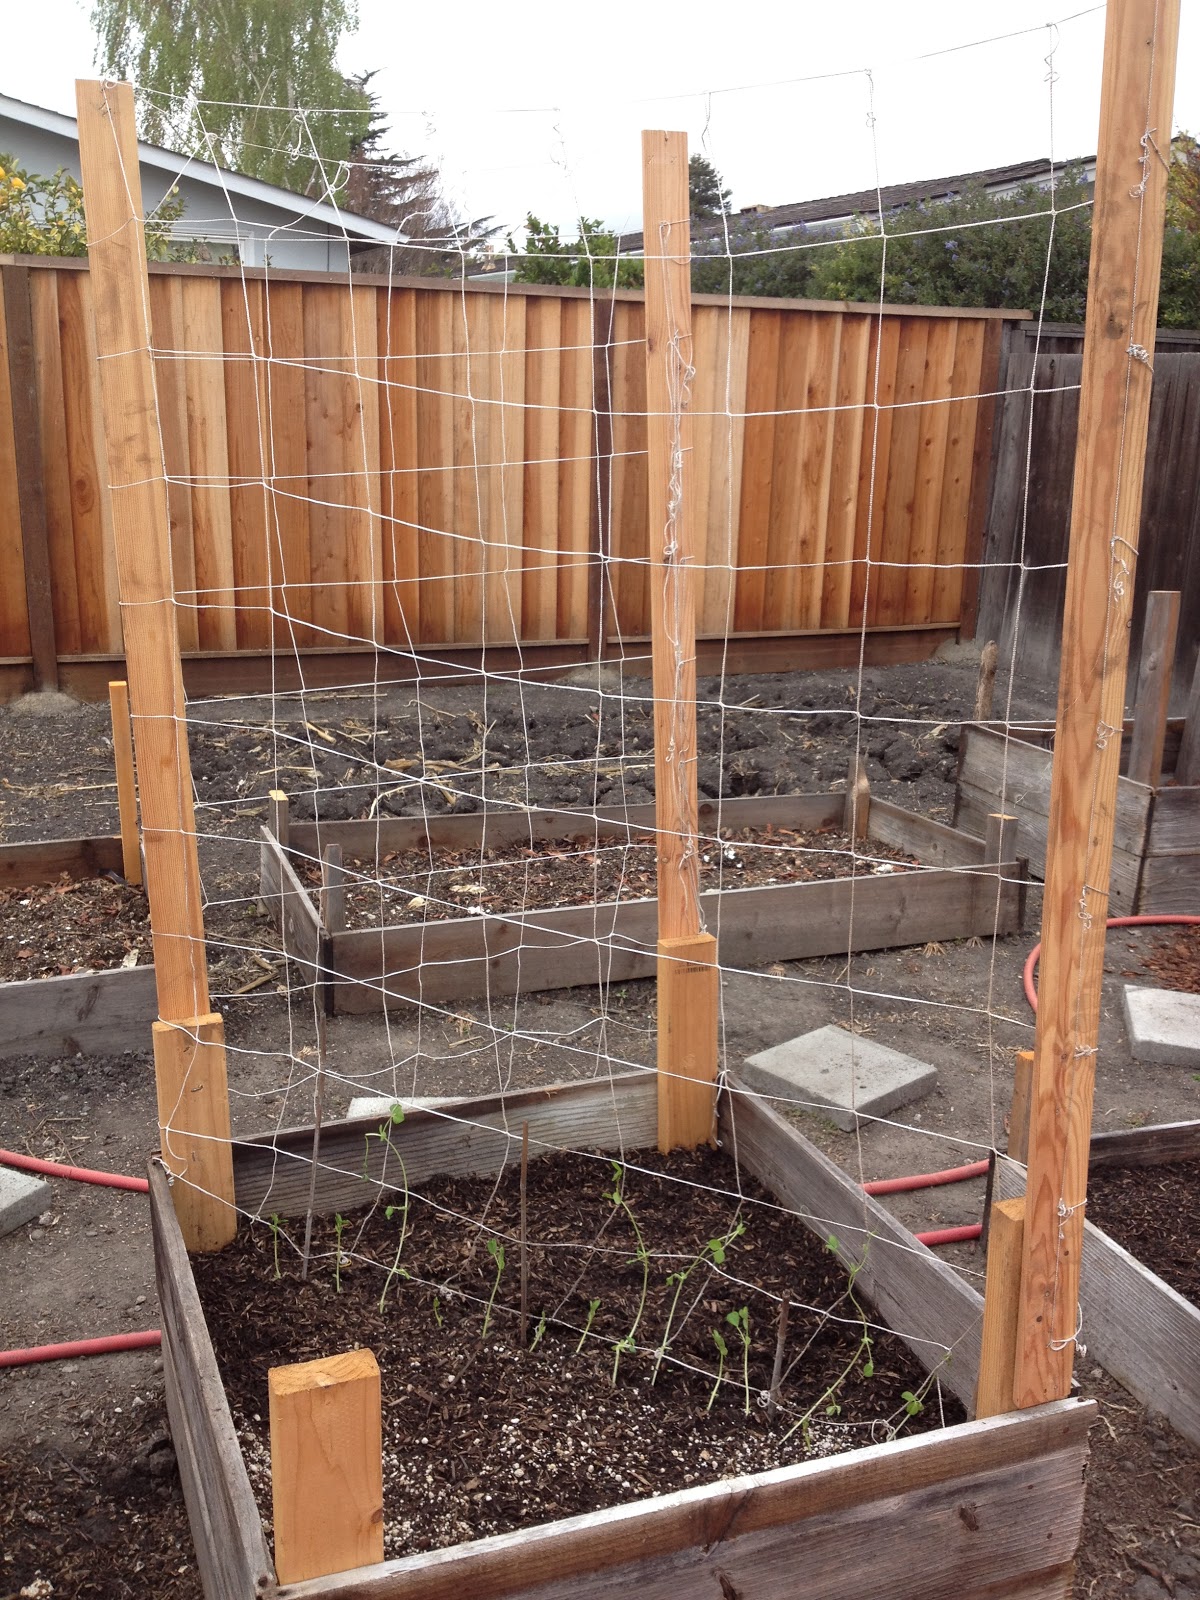
Vertical gardening is growing your fruit up on netting or any other type of support structure.  You could use a chain link fence to create a vertical garden.  Can you imagine a fence accented with food for you to consume?  Yum!  Simply put, you grow up to save space.  However, Fell would also add that vertical gardening produces more fruit.  Either way, I wanted to try it out.  I was tired of digging holes and moving vines when space was filling up.  I wanted a vertical garden... so how do I start? According to Fell, there are two important starting points when planning a vertical garden:
  1. You will need a good location/soil for the plants.
  2. You need good support structure for the vertical garden (i.e., netting, trellis, boards, stakes, etc.)
Chapter two discusses the basics and introduced me to lasagna gardening.  Lasagna gardening is an easy way to reuse items and turn hard weed infested ground into soft fertile soil.  I used the lasagna technique when preparing the garden beds in the victory garden.  I first laid down 10-15 layers of newspaper on the bottom of each garden bed.  I hosed down the newspaper a few times while laying down the various layers of newspaper.  Then I filled the bin with browns, greens, browns, greens, etc.  Browns refers to dried leaves and chopped up corn stalks.  Greens are lawn clippings and fresh kitchen scraps typically used for composting.

one layer of newspaper, wet, repeat 15X
add a layer of browns
add a layer of greens, repeat with brown
I filled each garden bed 50% using the lasagna gardening method.  I spread our homemade compost over the layers of "lasagna" and topped off the bed with a bag or two of gardening soil.  I did not fill my garden beds to the top.  I like the boards taller than the seedlings or transplants.  The taller sides break the wind that could snap delicate bean transplants or seedlings.
double layer (back) and single layer (front) garden beds

My effort to build garden beds with recycled materials while enforcing a no dig policy has come to an end.  I was successful in building garden beds out of recycled materials.  My family recently replaced the front yard fence.  We saved the planks from the old fence and used them to construct the sides of the garden beds.  The vertical boards are leftovers from old wood projects or broken furniture.  Additionally, I filled each bed with organic materials found and produced around the house.  However, my no dig policy was short lived when I ran-out of garden bed and lasagna bedding material.  With the need to be green and not consume and purchase more material, I retreated to last season's soil preparation format.  I forked and tilled the soil before the rains came. The soil was still moist and easy to manage. I laid the irrigation and planted corn.  I have enough space in all of the beds built to plant my seedlings in the nursery.  Yeah!
filled with lasagna layers and topped with homemade compost
I have planted the corn (with irrigation).  There are four rows with 20-25 seeds in each row.  The sugar snaps, beets, pak choi, and radish variety are enjoying the cool wet weather.
netting for sugar snaps, blue lake, and royal burgundy beans

VICTORY GARDEN ALERT! VICTORY GARDEN ALERT! The outdoor nursery has been tossed by the notorious Chewy Nho.  Chewy stated, "I was looking for a long lanky fella with a wormy looking face and accidentally tossed the seedlings."  Authorities took pity on Chewy and sent him off with a warning. The seedlings have been replanted and given a drink to calm their roots.

Monday, January 9, 2012

Radish, mustard greens, and jam for winter

Mustard greens
The victory garden had an usually dry and warm winter season.   The warm sun and the dry weather did not stop the mustard greens.  The cool air helped keep the mustard greens tall and lush while keeping the ground moist.  I did not water the winter crops this season.  I wanted to test the winter rains and soil.  The greens loved the solitude and kept on growing.  We could not eat them fast enough and we still have more to harvest.  These greens are great in soup, hot pot, and stir-fry.  I plan on planting many more winter greens next season.
Long crispy Minowase radish
The Monowase radishes grew well too.  I started with seeds and like magic the longest radish reached 17 inches. Most of the time you never know the length of the radish.  In addition the green leafy tops can also be misleading.  Only harvest your radishes when the tops of the radish stick out of the ground and are roughly 1/2 - 1 inch in diameter.  You can then gently pull the radish from the ground and enjoy the crunchy texture and spicy nutty flavor.  Once the radishes in the my victory garden reach a size my family likes, we picked, cleaned, and chopped each one.

marinated radish
My family enjoys marinated vegetables. Dried radishes are fantastic sponges and great for soaking up flavorful marinades.  Here is how my mother and I make this tasty and crunchy side dish.  After 24-48 hours in the dehydrator, radish dry very fast, you will take all of the dry bits and place them into jars/containers.  My mom uses old plastic containers but canning jars will work too.  Fill each container half-way.  This will allow the radish to expand.  Remember radish are like sponges and will expand while soaking up the marinade.  The sauce is what makes the dish.  I suggest trying out a few types of sauces in smaller batches if this is your first experience with marinated radishes.  You can find recipes online or in a variety of cookbooks too.  My family's recipe consists of water, soy sauce, fish sauce, and sugar.  My vegetarian version uses water, soy sauce, rice vinegar, sesame oil and brown sugar.  Depending on the taste you want you can add a more or less of each ingredient.  The goal with the marinade is to fill the jar.  You want to give the radish every opportunity to soak up the flavors of the marinade.  Cover the jar and place the filled jar into the fridge.  Within 24 hours you will have a tasty side dish for any breakfast, lunch, and dinner.

Thai Dragon Chili Pepper Jelly
Pepper jelly was the favorite item in my holiday bags this year.  I decide to make this batch of pepper jelly using the Thai Dragon Chili peppers from the victory garden.  I have friends and a mother who loves HOT HOT HOT food.  This was my special treat for each of them.  I followed a previously discussed Pepper Jelly recipe but canned the jelly in smaller decorative 6 oz. jars. My previous batches were made in pint and recycled jars.  The small red and white jars were a hit and many of neighbors were pleased with the spicy sweet flavor.

Rest in Compost (RIC): There are always casualties in any garden and the odd winter weather brought a few.  The only item that did not prosper and grow was the Brussels sprouts.  They need lots of water and there was little to no rain this season.  The carrots loved the cold weather too but did not fair well in the dry winter soil.  The lack of water gave the carrots a rubbery texture.  RIC dear Brussels sprouts and carrots, until we meet again.