Sunday, October 16, 2011

Sweet and spicy Pepper Jelly!

During the 2010 holiday season my neighbor dropped off a few half-pints of her jalapeno jelly.  It was delicious!  I love pairing the jelly with cream cheese on a croissant. Yum!

homemade pepper jelly
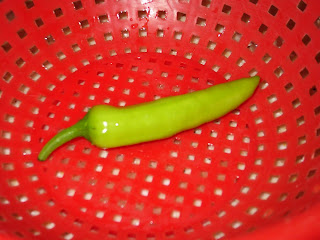
After a great experience eating and savoring each bite of my neighbor's jalapeno jelly I decided to make my very first batch of homemade jelly.  I made my first batch of pepper jelly, name of recipe in the Betty Crocker Cookbook, using four pepperoncini in place of four jalapenos.  I used 5 ingredients to make the jelly: pepper, sugar, juice, vinegar, and pectin.

Keep in mind that pepper jelly has a kick/ spicy flavor.   I chose to use pepperoncini peppers instead of jalapenos because I did not plant any jalapenos and the pepperoncini plant produced spicy peppers.  Usually pepperoncini peppers are sweet but I planted them too close to my Thai dragon pepper plants this year.  This caused cross pollination to occur between the Thai dragon and pepperoncini plants, which led to my sweet peppers tasting spicy.

 
Boiling the juice, peppers and vinegar
I admit, I was a little intimidated by the thought of making homemade jam.  However, I found the entire process very simple and easy to complete.  To my surprise the preparation process took longer than cooking and canning the jelly.  I would have cooked a larger batch if I had known how easy it was to make the pepper jelly.

I have tasted the jelly and it is really good.  I cannot wait to pop open a jar and eat some spicy jelly with my toast on a cold winter's morning.  I still have lots of peppers left and will try a few variations before the first frost.  Wish me luck and I hope I don't burn too many taste buds with my pepper jelly this holiday season.

Friday, September 30, 2011

Beetles, Corn Stalks and ATTACK OF THE KILLER JULIET TOMATOES!!!

The victory garden is home to many creatures from super tiny organisms to the size of you or I.  While getting ready for work, my father called out from the backyard.  He wanted me to visit the victory garden with the camera.  I walked out to the garden, my father pointed to the ground, and there were two Fig beetles mating in the victory garden.  By the time I arrived the beetles were post-coitus but I could still see they were "connected." 

My father and I have also seen lots of larva in the compost.  We often find large fat grubs in the compost too.  We throw them into the main garden and they bury themselves into the ground.  However, some do get eaten by the many feathers in the area.

Larva in compost

With animals comes the corn.  I recently realized the dual function of planting corn.  First, the stalks produce ears of sweet yummy corn.  Second, they are also home to many animals in the garden.  However, these are temporary shelters and the fall skies has brought corn production to a halt.  So now is the time to say goodbye to the temporary stalk shelters with a simple cut, chip and compost.  Many of the stalks were still green when I cut down the seven rows of corn.  I laid all of the stalks against the fence to dry out.  From experience, my father mentioned that green stalks get caught up in our chipper.  Additionally, it would take more time to clean out the green stalks from a chipper then it would to chip up an entire pile of dried stalks.  After a few days of baking in the sun, I noticed most of the stalks were turning brown.  By this weekend I will have all of the corn stalks chipped and ready for use in the compost or as mulch.  Either way it breaks down and help with maintaining weeds during the winter or keeping roots warm on cold nights.

HOLY SPICY JALAPENO!  THE TOMATO INVASION IS BACK!  We did not think it was possible and truly believed the tomato invasion had been wiped clean from the victory garden this season.  However, one plant tricked us all and grew into the largest growing and producing plant in the victory garden.

My family and I have filled bowls of inch long grape sized tomatoes produce by the Juliet tomato plant.  The plant stood three inches when transplanted into the victory garden.  Now the plant hangs over the fence into our neighbor's backyard.  I believe this size plant could feed up to four families, at least.  If my calculations are correct, each family would receive a huge bowl of tomatoes each month.  The Juliet tomato plant has produced over 200 tomatoes and is currently in the continual harvest phase.  In other words, the plant is producing ripe fruit that needs to be harvested every few days.  

Juliet tomatoes and radish from the Morrison Victory Garden!

The tomatoes are so sweet and taste tarty when eaten green.  We eat the ripe dark-red tomtoes like cherries.  Just pop them in our mouths and chew.  Mmmmmm!  But the challenge with having a large producing plant is the harvesting, preparation, and cooking times.  I spend about 20 minutes picking tomatoes each time I harvest the plant.  It takes this long or sometimes longer because the branches of the plant have grown into, around, and in between each other.  I would have to lift up a limb of the tomato tree, push various branches aside when trying to grab a handful of overly ripe tomatoes near the trunk.


Juliet Tomato plant - May 2011
Juliet Tomato plant - Sept. 28, 2011

In previous years, our tomato plants have grown so big that we cut water to the plants all together... and they still produce and grow huge amounts of tomatoes.  Our climate and the location of the plants makes all of the difference.  Tomatoes just love the victory garden.  We love them too just as long as the invasion does not knock out any of the other veggie contenders in the garden. 


Sunday, September 18, 2011

2011 Harvest Feast

Winter is coming.  The cooler evenings and the brisk mornings bring a tear to my eye.  The corn stalks are turning brown and the green bean leaves are drying out.  The victory garden is slowly coming to slow halt this season.  Not all is bad though.  There is always time to cook and eat the fruits of our labor and that is what happened during the 2011 Harvest Feast.

This year I was able to share the victory garden's culinary delights with friends as well as family.  Now you may be wondering, "what's on the menu?"  I tried to incorporate as much of the victory garden into each recipe without tarnishing the integrity of each dish.  Remembering that I only have a garden, and not a farm, to contribute to the meal I found myself adding in a few key ingredients here and there to help bring flavor and enjoyment to each dish.  This is what we munched on during this year's harvest feast:

stuffed peppers
Elote (aka Horn corn, Mexican corn on the cob) - steamed/BBQ/boiled corn on the cob, covered in mayo and lime, rolled in cotija cheese and sprinkled with hot sauce

Stuffed bell peppers - red and green bell peppers filled with stuffing and barbequed for 20 minutes; stuffing is made with white rice, portabella mushrooms, chives, and pepperoncini peppers

Yellow neck squash bread - our large harvest of yellow neck squash this year has allowed me to experiment with bread.  I love to make zucchini bread and found yellow neck squash is a yummier alternative when zucchini is not available.  I personally prefer the yellow squash over the green zucchini any day. 
veggie casserole

Salad - this dish utilized the lettuce, cucumber, basil and tomatoes from the garden

Dill pickles, salsa & chips - pickles and salsa were canned during the 2010 season

Spiced Ginger and Mom's pickled cucumbers - see my July 29, 2011 blog for recipe

Veggie casserole - egg plant, yellow neck squash, zucchini, green beans, chives, cheese, mushroom soup, and topped with bread crumbs

Veggie and animal burgers - Boca spicy chicken burgers and beef patties on whole wheat buns;  cheese, lettuce, tomatoes and onion were available to add to each burger


Victory Garden Alert!  Victory Garden Alert!  The garden has produced the largest zucchini the garden has ever grown.  The zucchini measures 20 inches in length.  Large zucchini, like this one, is great for stuffing and baking.


Tuesday, August 30, 2011

Corn is good for the tummy!

Corn!

Corn is a staple in many diets around the globe.  In my household corn is craved, demanded, and savagely consumed around the barbeque.  On May 3, 2011, I planted 7 rows of corn in anticipation of a small harvest this year.  I always hope for a harvest that yields 100 ears of corn.  This year the victory garden gave birth to 127 ears.  This count only includes ears that have kernels wrapped around the entire cob and the wrap of kernels are at least 5 inches in length.

I counted at least 30 gnarly looking ears of corn that are great for the grill when eating cooking up burgers.  The gnarly ears usually have kernels on one side of the cob and/or the kernels are spread far apart.  I also feed the notorious Chewy Nho, bean bandit and traveling guru,  a gnarly ear to keep him away and preoccupied while the ears are being husked and cleaned.

When storing corn for the winter, my family blanches each ear and freezes the entire cob.  The frozen cobs can be thawed, cooked, and eaten.  I usually wrap the frozen corn in tinfoil and place them on the grill for a maximum of 25 minutes.  Of course you can always boil or steam the frozen cobs too.  It all depends on what you are eating with the corn.


The victory garden as a whole has produced quite a bit of fruit.  With that fruit, my family and I have cooked, stored and eaten quite a big this summer.  The rat hole count currently stands at:
Chop chopping the Salsa Mix

Corn frozen - 92 ears/21 gallon freezer bags (8 bags with 5 ears and 13 with 4 ears)

Salsa Mix frozen - 4 quart freezer bags (2 batches of salsa per bag; 8 bell peppers and 10 pepperoncini per bag)

Zucchini Relish canned - 1 quart and 3 pints

Bread and Butter Pickles canned - 3 pints

Bread and Butter Veggies canned - 5 quarts (zucchini, squash, cucumber and green beans)

Pickled Pepperoncini canned - 2 pints

Veggies sliced frozen - 5 gallon freezer bags (zucchini and squash)

Veggie Stir-fry Mix frozen - 8 quart freezer bags (zucchini, squash, bell pepper)

Mixed Veggies dehydrated - 3 quart freezer bags and two pint jars


Bread and Butter Veggies

Tuesday, August 16, 2011

Coccinellidaes and Mantodeas fight to save the victory garden from alien invaders


In a galaxy far far away lives an ancient civilization of Aphidoidea.  Aphidoidea are vicious warriors whose purpose in life is to eat and take control of all others with their mind controlling goo.  The Aphidoidea are from a planetary nebula called NGC 5189, more commonly known as the Spiral Planetary Nebula, located 3,000 light years away in the Musca constellation.  No one knows when the Aphidoideas first came to this planet but scientists have found Aphidoidea fossils dating back hundreds of years.


The date was August 14th and I saw my first Aphidoidea space ship hovering over the cornfield.  The ship hovered for a moment and then disappeared into the waving yellow tassels atop the corn stalks.  As I approached the field I became overwhelmed by the site of the Aphidoidea army covering the corn stalks with a dark blanket of bodies and translucent goo.  This goo is not visible to the naked eye but signs of the mind controlling solution attracts most Formicidae who are a common ally to the Aphidoidea clan.

 
I immediately had to call in reinforcements.  I knew I needed an army that could withstand the high numbers of Aphidoideas and would be resistant to the sweet smell of their psychotropic liquid.  After much searching and with a little training from the mighty general Chewy Nho and his first lieutenant Mooch I was able to form a 1500+ army of Coccinellidaes and Mantodeas.  The Coccinellidaes are ready to fight and will form the first wave of the attack.  The Mantodea have chosen their fiercest ninja warriors to participate in the second wave of battle.  The Mantodea are cunning and stealth-like in their attack methods.  While the Coccinellidaes distract the Aphidoidea, the Mantodea will conceal two egg sacks within the victory garden.  After a few days, the ninja Mantodea warriors will emerge from the egg sacks and will form our second wave of attack.  The Aphidoidea won't know what hit them.


My general and his first lieutenant are now warming up for the battle and will soon lead the charge against the alien invaders from Musca.  Wish my army luck!

Sunday, August 14, 2011

Bring on the bitter in the bitter melon!


The bitter melon have reached record sizes in the victory garden.  Each one is about 12 inches long with a shorty coming in at 7 inches.  I think this plant produces the coolest looking fruit.  The skinny vines of the plant and the round bulbous green warts lining the outer surface of the fruit are two markers of how different this plant looks in and out of the garden.  When cooking this delectable fruit, my family stuffs the long green spiky bodies with a mixture of meat, veggies, rice noodles, fish sauce and additional seasonings and submerges them into a broth to cook.  The melon cooks and bobs into a soup bitter from the fruit yet sweet from the meat.  We also pop the stuffed bodies into the freezer for winter time munchies.  Warm bitter melon soup is good on cold days.


Another culinary triumph has swept through the victory garden.  During the 2009 season, my family canned a variety of pizza and pasta sauces made with ingredients only found in our garden.  That season brought us "The Great Tomato Harvest" and we did not have enough time to eat and give away all of the tomatoes.  Needless to say we canned many jars of sauce that season. 

Flash forward to this week.  As I was rummaging through the pantry I found the last jar of Morrison Victory Garden 2009 pasta sauce.  I took this discovery has an opportunity to create a spaghetti sauce made from only ingredients from the victory garden.  I grabbed the jar, popped it open, and poured the pasta sauce into a large deep skillet.  I then picked, washed, chopped and added the following items from the victory garden: basil, chives, black bell peppers, squash and zucchini.  I let the entire mixture of sauce, veggies and herbs simmer down to a thick mass of goodness.  I placed cooked noodles on a plate, dumped a spoon full of veggie pasta sauce on top of the noodles, sprinkled the mound with Parmesan cheese and accented the dish with a long toasty piece of garlic bread.  TA DA!  You have a spaghetti dinner with sauce made from the victory garden... mmmmm!

Thursday, August 4, 2011

Blanching & Freezing Vegetables


I like to eat veggies during the winter but found that my favorite vegetables are only available during the summer months.  So what should a summer veggie person do?  This is where a pot of water and the freezer come in handy.  I have blanched, packed and froze about five gallon bags worth of squash and zucchini this year.  The bags are accumulating in the freezer and will soon be eaten in stir-fry, in soup and from the grill.  Here are the steps I took when preparing, blanching and freezing the veggies.

Preparation:
  • a big pot
  • large spotted spoon
  • colander
  • cutting board
  • knife
  • water
  • Ziploc freezer bags
  • lots of veggies
  •  black marker

Directions:
  1. cut the veggies into thick slices
  2. boil the water
  3. place veggies into water for 30 seconds, stirring occasionally
  4. using the spotted spoon place veggies into the colander
  5. rinse veggies under cold water
  6. place veggies in Ziploc freezer bags
  7. write the date on the bags with a marker
  8. lay the bags flat in the freezer

Sound simple?  It really is.  I had no idea how simple the blanching process is for vegetables.  The veggies I blanch do not need to be in the water for more than 30 seconds which makes the process even less time consuming.  I was told and have read that veggies which are cut too thin or blanched for too long will get mushy after thawing out.  I do not want this to happen so I am cutting the squash and zucchini into 1-2 inch slices and the bell peppers into quarters.

I have to admit that my first few blanching efforts were not too impressive.  Before doing any research I cut up thin slices of veggies and blanched them for 5 minutes.  Everything seemed to be fine until I was packing the veggies into the freezer bags.  I noticed the veggies were very soft.  I had to be extremely careful not to squeeze hard or else the veggies would fall apart.  Needless to say, the first two bags of frozen veggies will be used in soup.

On a positive note, I have created different vegetable mixtures that could be used for specific dishes.  For example, I have three quart sized bags labeled "Stir-fry Mix."  This mixture includes bell peppers, eggplant, squash and zucchini.  This mixture could be fried with meat, tofu or alone.  I prefer frying the veggies with oyster sauce, minced garlic and red pepper.  I then add cooked drained noodles and let the mixture fry for an additional 5 minutes.  This recipe makes for a good side dish during lunch or dinner.


Since the squash is rockin' this season I have many more bags of squash than any other vegetable.  In this case, I place different cuts of squash into separate freezer bags.  I am then able to use the long slices of squash for grilling or barbeques and the smaller round slices for ratatouille, soup, salads, or any other recipe calling for squash.


Chewy Nho - Mugshot

Victory Garden Alert!  Victory Garden Alert!  Bean robber caught!  The elusive bean robber is no longer hiding from the authorities.  At 12:15 PM authorities announced that the bean robber is Chewy Nho.   Chewy was caught on the surveillance cameras stealing a bean at 9:05 AM.  He was then apprehended by the authorities and charged with "theft of a bean."  Chewy was placed in the dog house for 18 minutes until he broke out with help from his associate Mooch.  Mooch, the catnip pimp, was though to be the bean robber by authorities on July 16th until a footprint found at the crime scene ruled him out.  The following images were taken by the newly installed surveillance cameras.

Chewy running from the authorities.

Friday, July 29, 2011

Cucumbers are staying cool


Over the last two years the victory garden has produced cucumbers in all shapes and sizes.  Regardless of the shape each cucumber slices up nicely in salads and side dishes.  The family favorite is the pickled cucumbers.   There are variety of ways to pickle your cucumbers and I have tried dill, kosher and fridge.  Over the last week over 20 pickles were picked.  The largest pickle was nine inches long and the smallest was four inches.  I decided to make two variations of fridge pickled cucumbers: Ginger-Spice Cucumbers from the Better Homes and Garden New Cook Book 15th Edition; Mom's Cucumbers from Allrecipes.com (http://allrecipes.com/Recipe/moms-cucumbers/detail.aspx).

Ginger-Spice (left) and Mom's (right)

I personally like the sweet snappy taste of the Ginger-Spice but Mom's is a family favorite and tastes good with meat and vegetables.  You can place these cucumbers on sandwiches, hot dogs, rice bowls or just have it as a side dish.  Fridge pickled cucumbers are easy to make since there is no canning.  Just slice, toss, pack and refrigerate the cucumbers and you are ready to munch on some crispy tangy cucumbers.  Nom nom!

Victory Garden Alert!  Victory Garden Alert!  The bean robber has been spotted!  Cameras have caught a glimpse of the robber for the first time.  CSI have confirmed that the canidae hair is a visual match to the fur caught on camera.  The bean robber was quick and avoided showing his face while fleeing the scene.  Authorities have doubled their surveillance in hope of catching the canid while he is in possession of the stolen veggies.  For now authorities have given us the following image to help us spot the robber.

Wednesday, July 20, 2011

Dehydrating Veggies


Green and Black Bell Peppers
I currently own a 1993 Ronco food dehydrator.  My family has used this dehydrator to make dried fruit, dry nuts, and make beef jerky.  With all of the zucchini and squash being produced I decided to try out the dehydrating process.  There are no buttons on the dehydrator.  You just plug it in and you are ready to go.

Sprinkled with garlic salt and cayenne pepper... mmmm!
I sliced up zucchini, squash, bell peppers and radish.  I cut thin slices to help the snacking process after dehydration.  I am a huge fan of veggie chips and this will definitely be a great treat.  I sprinkled every item with garlic salt and added cayenne pepper to one tray.  The items should be done in a day or two.  I will be placing my items in airtight jars and Ziploc bags.

Radish and Squash

Tuesday, July 19, 2011

The Pepperoncini - Part Two!


I canned my first batch of pepperoncini peppers!  Woo hoo!  I have two small precarious looking pint jars full of pepperoncini goodness.  Following advice of Walnut Spinney I soaked my peppers in salt water over night, about 14 hours.  I rinsed the peppers and set them aside.  I then prepared the brine and a processing pot.  For 2 pints of peppers I used:


2 pint mason jars with lids and rings for sealing
lots of pepperoncini peppers
2 tbsp sugar
2 1/2 cups of apple cider vinegar
one clove of garlic
1/2 cups of water

brine (left) and processing pot (right)
I let the entire mixture simmer for 10 minutes.   I then cut the clove in half and place a piece in each pint jar.  I then clean the rims, pour the brine, put on the hot sealing lid and ring, screw on the ring tight and place the jar in the processing pot.  The processing pot is a pot of boiling water which the jars sit in.  I have read many different reasons for why the water should cover the jars and why only half should be submerged.


I was taught that a third of the jar should be submerged into the water for processing so I followed those very directions.  I also poured hot boiling water over the tops of the jars every couple of minutes too.  I just used the water in the pot and a ladle.  After ten minutes I removed the jars and let them sit until each jar sealed.  Sealing should occur a few hours after processing.  I labeled the jars and placed them in the cupboard.  Now the hard part.... waiting a few months for them to turn into yummy goodness.


The Pepperoncini


I like the pepperoncini pepper.  It is an extremely versatile pepper.  You can put pepperoncini on sandwiches, salads, pizza and even in your omelets.  I have been debating if I should freeze or can the peppers.  After much thought and much research I have decided to can my first harvest of peppers.  I left many pepper on the plant and saw many more pushing out on the plant's upper limbs.  I will have many more to experiment with.  I will be using pint size canning jars.  My peppers are not very large so I can get away with using smaller jars.


I have been reading the tales of Walnut Spinney and found her blog about pickled peppers to be informational and entertaining.  I am currently soaking my peppers in salt water.  This is recommended by Walnut Spinney.  I really like her salty then sweet canning recipe.  I am excited to see the finish result.  To read more about the pepperoncini canning process and recipe visit, http://walnutspinney.blogspot.com/2008/09/pickled-pepperoncini-peppers-or-hot.html.  Thank you Walnut Spinney!

Saturday, July 16, 2011

May the bounty flow!


I went out to water and check on the victory garden and came back with a basket full of vegetables.  I started my harvest by picking the radish.  The radish taste very crisp and are very mild.  Great addition in salads or as a side dish when eating lunch or dinner.  I also picked a few four-inch cucumbers and two six-inchers.  These will also be salad and side dish items on the table.  I have also seen family members put the cucumbers in soups and omelets.  The squash and zucchini produced a good amount of fruit this week.  These harvests are great and I am looking forward to the upcoming weeks. 

The beans produced a good amount of long thick beans.  All of the mature beans were picked along with the bell peppers and pepper and herb plants.  I have my sage hanging upside down.  Once the leaves are dry and brittle I will place them in a container for use during the winter.  Mmmmm!  I can see big plates of spaghetti and hot bowls of soup and stews in my future.

I am also happy to report the eggplants are doing very well.  After being a victim to Mooch's mood swings on catnip and freezing under the summer cold-filled nights, I thought the plants would not make it.  Fortunately they plants pulled through and are now producing fruit!  Grilled veggies have never tasted so good until you add grilled eggplant to the mix.  Nom nom!

Victory Garden Alert!  Victory Garden Alert!  CSI has stated that the two hairs found at the last bean robber crime scene are from the felidae and canidae families.  The felid is none other than Mooch the catnip pimp.  CSI reports that Mooch's DNA was a match to the DNA found in one of the hairs.  The second hair found is not in the DNA database.  Additionally, a foot print was found at the latest crime scene.  CSI reports that the print does not match Mooch and he is no longer a suspect.  Authorities have installed surveillance cameras throughout the garden in hopes of capturing the bean robber on camera.

Wednesday, July 13, 2011

Silk and Tassels

The corn is looking really good.  The shortest corn stalks measures around five and a half feet tall.  The tallest stalks measure about 8 feet tall.  The tassels are pushing up and many have begun swaying in the wind.  The silk has grown out and will soon kernel up into delicious corn.  I have only seen a handful of ears on the east row of stalks.  I have not walked down the western three rows in a few weeks but I am hoping to find lots of ears growing during my stole down Corn Street this weekend.  
Victory Garden Alert! Victory Garden Alert!  Authorities were called to the victory garden at 9:58 am after receiving an emergency call from the local squirrel community.  A squirrel reported hearing a noise moving through the corn followed by a crunching sound.  Authorities found a bean top connected to a broken bean vine at the corner of Corn Street and Zucchini Court.  CSI recovered two strands of hair from the crime scene.  The strands were sent to the lab for analysis.  In addition, CSI reports finding three teeth marks on the lonely bean found at the last crime scene.  The teeth were said to be small and sharp.  Based on the size of the marks CSI estimates the bean robber to be 8-12 inches in height.

Sunday, July 10, 2011

Catnip tea


I have been growing catnip for the past two years however, I have not been able to harvest any catnip.  The minute I brought the catnip plant home my cats, and even my dog, eat at the leaves and climb into the pot.  The plant is now very small and barely produces big leaves.  To see the effects that catnip has on cats and dogs visit http://wanderingchewy.blogspot.com/2011/07/catnip-is-just-for-cats.html.

At the beginning of the season I bought three catnip plants and have kept them under lock and key.  The plants are protected by a white metal cage.  I occasionally leave the cage off  but after a few minutes the cat will have his face in the plant.  I seriously think my cat would eat an entire catnip plants in one seating.  No joke.


With this new batch of catnip I have decided to make Catnip tea.  I have found that catnip tea is good for relaxation in the muscles and body.  I have read that catnip tea can help you fall asleep.  I enjoy Chamomile's taste and fragrance as a sleeping remedy and will look forward to drinking Catnip tea while relaxing on a cool fall evening and cold winter's night.

I will be drying the leaves and storing them in an airtight container.  When making the tea, add boiling water to the dried catnip leaves.  Allow the water and leaves the steep for 5-7 minutes.  You can start with 1 tsp. of Catnip for every 8 oz. of water.  I prefer a stronger catnip flavor (2-3 tsp.) and often sweeten the tea with honey or condensed milk.  I use condensed milk if I want a more sinfully richer taste.  With just a few leaves, boiled water and sweetener you can turn any cat treat into a fresh brew of tea.